
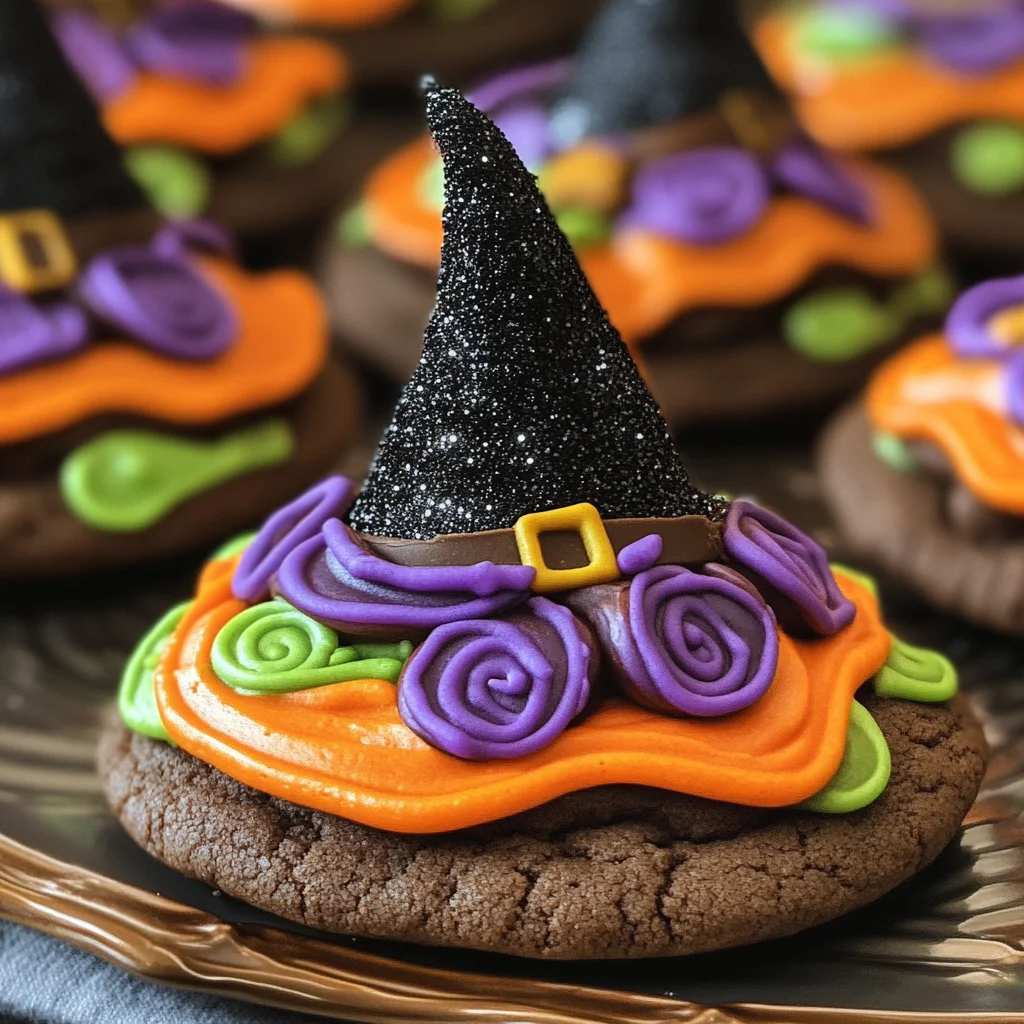
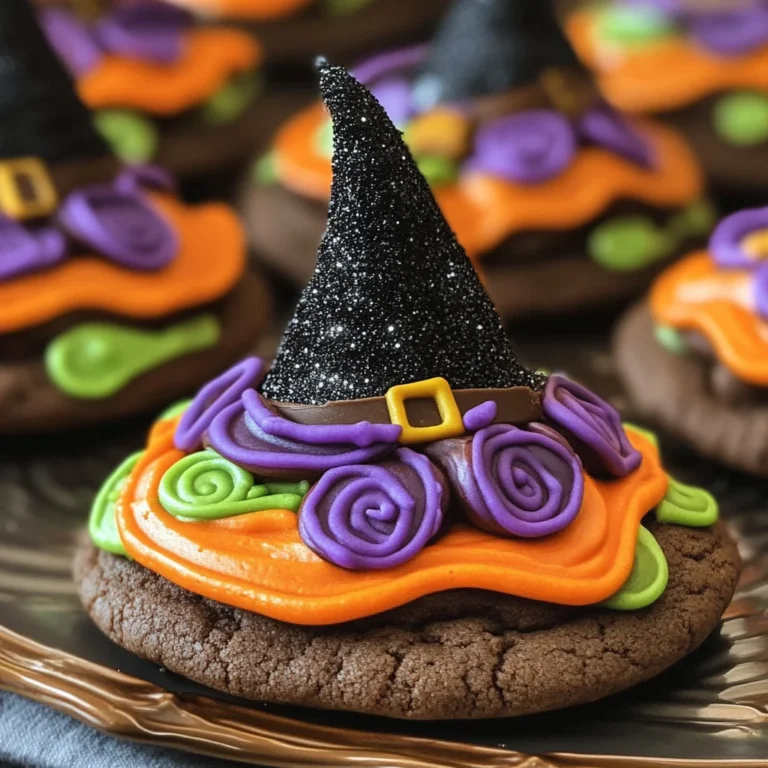
These Halloween Witch Hat Cookies are not just a treat; they are a delightful project for families to enjoy together. Perfect for Halloween parties or festive gatherings, these cookies combine fun and creativity with their whimsical witch hat design. The chocolaty flavor paired with vibrant icing colors makes them a standout choice for any celebration. Whether you’re hosting a spooky soiree or looking for an engaging activity with the kids, these cookies will surely impress your guests.
Why You’ll Love This Recipe
- Fun to Make: This recipe is a fantastic way to involve kids in the kitchen and unleash their creativity.
- Eye-Catching Presentation: The vibrant colors and unique shapes make these cookies a visual treat that will wow your guests.
- Versatile Flavors: Customize the flavors by choosing your favorite cake mix or cookie base.
- Perfect for Any Occasion: While ideal for Halloween, these cookies can be adapted for various festive events throughout the year.
- Easy to Follow Instructions: The step-by-step guide ensures even novice bakers can achieve great results.
Tools and Preparation
Getting ready to make these Halloween Witch Hat Cookies is simple when you have the right tools at hand. Here’s what you’ll need:
Essential Tools and Equipment
- Cupcake Cones Baking Rack
- Cookie Sheet
- Parchment Paper
- Decorating Bags
- Icing Tips (2B and 3)
- Knife
- Spatula
Importance of Each Tool
- Cupcake Cones Baking Rack: This tool ensures that your sugar cones bake evenly and stand upright while cooling.
- Decorating Bags: These bags allow precise application of icing, which is crucial for creating beautiful designs on your cookies.
- Spatula: A spatula helps smooth out the icing, ensuring a professional finish on each witch hat.
Ingredients
These Halloween Witch Hat Cookies call for some fun ingredients that contribute to their magical appearance.
For the Cake Base
- Favorite Cake Mix or Try Wilton’s Chocolate Cake Recipe
For the Cookies
- Store Bought Chocolate Cookies or Try This Recipe from Wilton
For Icing Colors
- Lemon Yellow Icing Color
- Black Color Mist Food Coloring Spray
- Rose Icing Colors Pink Food Coloring
- Violet Icing Color, Gel Food Coloring
- Golden Yellow Icing Color
- Orange Icing Color
For Assembly
- Sugar Cones
- Creamy White Decorator Icing, 4 lb. Tub
How to Make Halloween Witch Hat Cookies
Step 1: Prepare & Bake the Cones
- Prepare your chosen cake mix according to its instructions.
- Place the Cupcake Cones Baking Rack on your cookie sheet.
- Insert sugar cones into the rack, filling each cone with 2 tablespoons of cake batter.
- Bake according to the timing instructions for your recipe and let them cool.
Step 2: Spray the Cones
- Trim any excess cake from the top of each cone if necessary using a knife.
- Place cones wide side down on parchment paper.
- Spray the cones with Black Color Mist until fully coated and allow them to dry for about 10 to 15 minutes.
Step 3: Tint the Icing & Prepare the Bags
- Tint 1 cup of creamy white decorator icing orange.
- Combine violet and rose icing colors to tint another cup of creamy white decorator icing purple.
- Prepare two decorating bags with tip 2B filled separately with orange and purple icings.
- Tint ¼ cup of creamy white decorator icing yellow using golden yellow and lemon yellow colors, placing it in a bag with tip 3 attached.
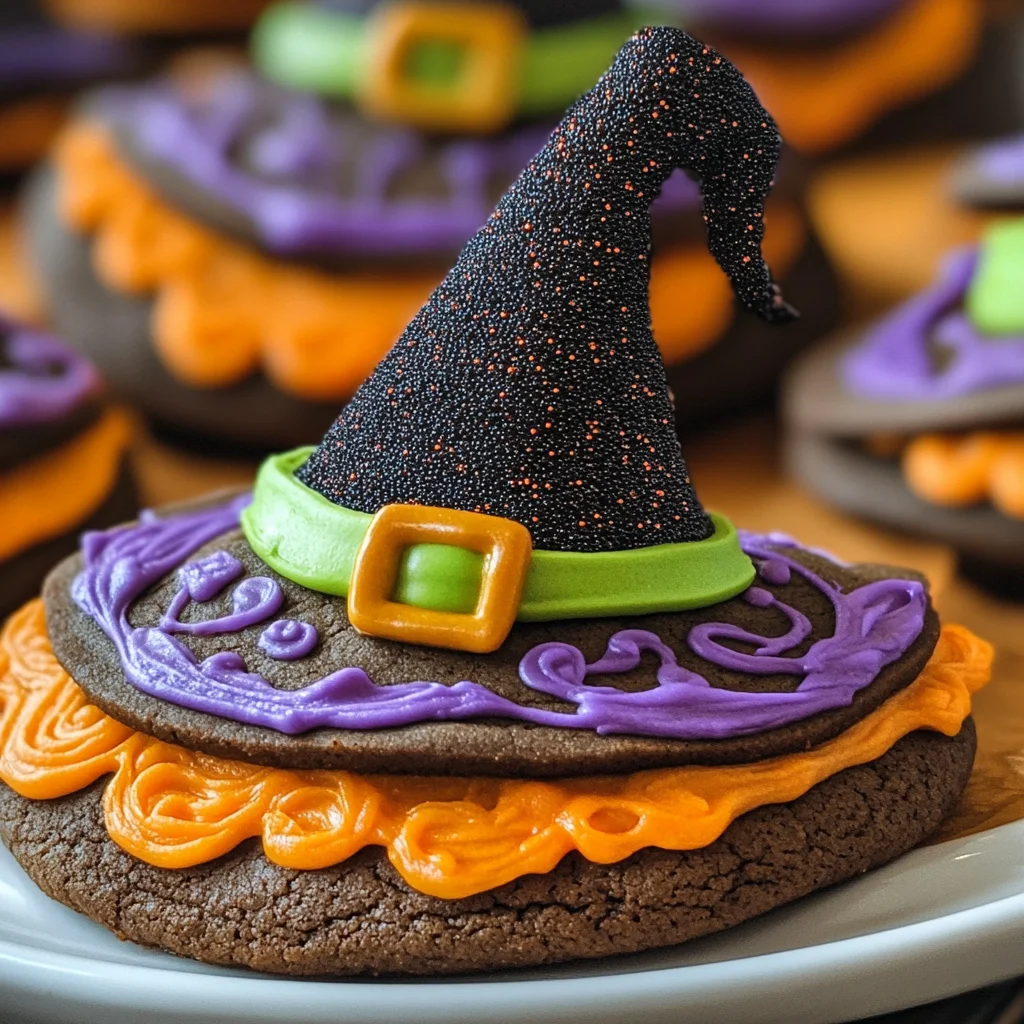
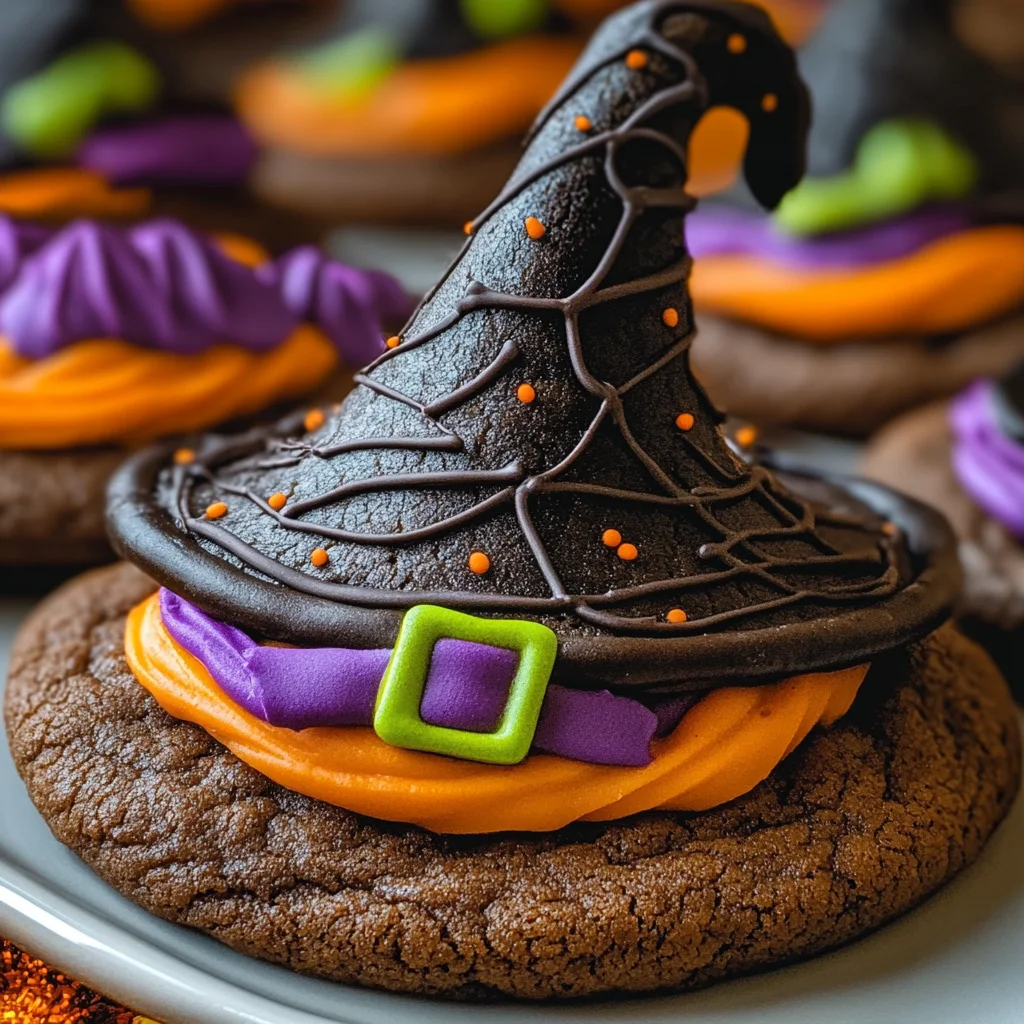
Step 4: Assemble the Witch Hats
- Pipe a small amount of orange icing in the middle of each cookie and place a cone on top.
- Pipe around half of the cones using orange icing, smoothing it out with a spatula.
- Repeat this process using purple icing on the other half of cookies and cones.
- Allow them to set for about 15 to 20 minutes before piping yellow icing around the bands as buckles.
- Let them set again for another 15 to 20 minutes before serving.
Enjoy making these whimsical Halloween Witch Hat Cookies as you bring festive cheer into your home!
How to Serve Halloween Witch Hat Cookies
These Halloween Witch Hat Cookies are a delightful treat that can be enjoyed in various ways at your spooky celebration. Whether you’re throwing a party or sharing with friends, here are some fun serving suggestions to make them even more exciting.
On a Festive Platter
- Arrange the cookies on a decorative platter adorned with Halloween-themed decorations like mini pumpkins or fake spider webs for an inviting presentation.
With Ice Cream
- Serve these cookies alongside a scoop of vanilla or pumpkin ice cream. The combination of flavors will create a delightful contrast that everyone will love.
As Party Favors
- Package individual cookies in clear bags tied with orange or purple ribbons. This makes for a cute party favor that guests can take home!
With Hot Chocolate
- Pair these cookies with a warm cup of hot chocolate. The chocolaty goodness of both treats makes for a cozy and satisfying snack.
In Cookie Boxes
- Create themed cookie boxes filled with Halloween Witch Hat Cookies and other spooky goodies. This is perfect for sharing with neighbors or colleagues.
How to Perfect Halloween Witch Hat Cookies
Making perfect Halloween Witch Hat Cookies is all about attention to detail and creativity. Here are some tips to elevate your cookie-making game.
Use fresh ingredients: Always check the expiration dates on your cake mix and food colorings for the best flavor and color.
Chill the icing: If your icing is too runny, chilling it in the fridge for 10-15 minutes can help it hold its shape better when piping.
Experiment with designs: Don’t hesitate to add sprinkles or edible glitter on top of the hats for an extra festive touch.
Practice piping: If you’re new to piping, practice on parchment paper before working on your cookies. This will help you get comfortable with the technique.
Adjust baking times: Since different ovens vary, keep an eye on your cones while baking to avoid overcooking or undercooking them.
Best Side Dishes for Halloween Witch Hat Cookies
Pairing side dishes with your Halloween Witch Hat Cookies can enhance your dessert table and provide a balanced spread. Here are some great options:
Pumpkin Soup: A creamy pumpkin soup warms up any gathering and complements the sweet cookies perfectly.
Spooky Veggie Platter: Create a platter with cut vegetables arranged like ghosts or monsters; serve it with a delicious dip to balance out the sweetness of the cookies.
Cheesy Eyeball Pasta: Use mozzarella balls and olives to make “eyeballs” in pasta for a fun, creepy dish that’s sure to delight guests.
Mummy Dogs: Wrap hot dogs in crescent roll dough, bake until golden, and add mustard “eyes” for a fun finger food option.
Witch’s Brew Punch: A green punch made from lime sherbet and lemon-lime soda adds a fizzy, refreshing drink choice alongside dessert.
Apple Slices with Caramel Dip: Fresh apple slices paired with caramel sauce provide a sweet yet healthy option that complements the cookies nicely.
Ghostly Popcorn: Drizzle white chocolate over popcorn and sprinkle with spooky toppings like candy corn for an eerie snack that everyone will enjoy.
Monster Fruit Cups: Assemble fruit cups using colorful fruits arranged to look like silly monsters; they add both nutrition and fun to your dessert table!
Common Mistakes to Avoid
Making Halloween Witch Hat Cookies can be a delightful experience, but there are some common pitfalls to watch for.
- Skipping the cooling step: Allowing the cake cones to cool completely ensures they hold their shape when assembling. If you rush this step, your cookies may crumble.
- Overfilling the cones: Filling the sugar cones with too much batter will lead to overflow. Stick to 2 tablespoons for perfect results.
- Using the wrong icing consistency: Icing that is too runny won’t hold its shape; if it’s too thick, it won’t pipe easily. Aim for a smooth yet firm consistency.
- Not letting layers set: Allowing each layer of icing to set before adding another is crucial. This prevents colors from bleeding and maintains clean lines.
- Neglecting storage tips: Storing cookies improperly can lead to them drying out. Use airtight containers to keep them fresh.
Storage & Reheating Instructions
Refrigerator Storage
- Store cookies in an airtight container for up to 5 days.
- Keep them at a stable temperature to maintain freshness.
Freezing Halloween Witch Hat Cookies
- Wrap cookies individually in plastic wrap and place them in a freezer-safe bag.
- They can be frozen for up to 3 months without losing flavor or texture.
Reheating Halloween Witch Hat Cookies
- Oven: Preheat your oven to 350°F (175°C). Place cookies on a baking sheet and warm for about 5-7 minutes.
- Microwave: Heat one cookie at a time on a microwave-safe plate for about 10-15 seconds.
- Stovetop: Cover cookies with a lid on low heat for about 2-3 minutes until warmed through.
Frequently Asked Questions
Can I use different flavors for Halloween Witch Hat Cookies?
Yes! You can customize the flavors by choosing different cake mixes or adding extracts like vanilla or almond.
What is the best way to decorate Halloween Witch Hat Cookies?
Use colored icing and decorations like sprinkles or edible glitter. Let your creativity shine!
How do I prevent my cookies from getting stale?
Store them in an airtight container and keep them away from direct sunlight. This helps maintain their freshness.
Are Halloween Witch Hat Cookies suitable for kids?
Absolutely! These cookies are fun to make and decorate, making them a great activity for kids during Halloween.
Final Thoughts
Halloween Witch Hat Cookies are not only delicious but also visually stunning, making them the perfect addition to any Halloween gathering. Feel free to customize these treats with different colors or toppings, allowing everyone to create their unique version. Try making these delightful cookies this season!
Halloween Witch Hat Cookies
Halloween Witch Hat Cookies are a delightful way to celebrate the spooky season! These whimsical treats combine chocolaty goodness with vibrant icing, making them perfect for Halloween parties or family gatherings. With their eye-catching design and fun assembly process, these cookies are not just tasty; they also provide an enjoyable baking activity that kids will love. Whether you’re hosting a gathering or simply looking to create festive memories in the kitchen, these cookies are sure to impress everyone with their unique witch hat appearance. Follow our easy recipe and let your creativity shine this Halloween!
- Total Time: 50 minutes
- Yield: Makes about 12 cookies
Ingredients
- Cake mix or Wilton’s chocolate cake recipe
- Store-bought chocolate cookies or Wilton’s cookie recipe
- Sugar cones
- Creamy white decorator icing
- Lemon yellow icing color
- Black color mist food coloring spray
- Rose icing color pink food coloring
- Violet icing color, gel food coloring
- Golden yellow icing color
- Orange icing color
Instructions
- Preheat oven and prepare cake mix according to package instructions.
- Use a Cupcake Cones Baking Rack to hold sugar cones filled with cake batter and bake until done.
- Cool cones, then spray with black color mist.
- Tint portions of creamy white icing orange, purple, and yellow.
- Assemble by piping icing on cookies and placing cones on top.
- Prep Time: 30 minutes
- Cook Time: 20 minutes
- Category: Dessert
- Method: Baking
- Cuisine: American
Nutrition
- Serving Size: 1 cookie (50g)
- Calories: 210
- Sugar: 15g
- Sodium: 120mg
- Fat: 8g
- Saturated Fat: 3g
- Unsaturated Fat: 4g
- Trans Fat: 0g
- Carbohydrates: 32g
- Fiber: 1g
- Protein: 2g
- Cholesterol: 15mg
Keywords: Customize flavors by using different cake mixes or adding extracts like vanilla. Decorate with sprinkles or edible glitter for added fun.